Installing ZSH with Oh My ZSH
 photo by Marc Rentschler
Over the years, many shells have been written for the UNIX-like operating
systems, from the original sh, to the latest or fancier Fish. I have used
most of them, even this “cross-shell prompt” called Starship, to customize my
bash prompt for Git or Kubernetes.
ZSH has been considered the most complete and advanced, since it was first
created in 1990, and it is the default shell for macOS since 10.5 (Catalina),
but I’d say that it’s not been until the creation of the Oh My ZSH open source
project when many people started to install it massively, including myself ![]()
The Oh My ZSH project is a framework which eases the configuration and customization of the ZSH shell. It comes with a lot of helpful functions, helpers, plugins and themes, I think that the later helped a lot to this adoption.
The installation process is quite straightforward, but I’ll summarize the fundamental steps to get it up and running with some decent configuration.
To install ZSH:
sudo apt install zsh
To test if it is already installed:
zsh --version
To set zsh as the default shell:
sudo chsh -s $(which zsh)
To install Oh My ZSH:
sh -c "$(curl -fsSL https://raw.github.com/ohmyzsh/ohmyzsh/master/tools/install.sh)"
ZSH uses the file .zshrc for its profile configuration (environment variables,
aliases, etc.) as bash uses .bashrc. When ZSH is installed it creates a
default version of that .zshrc file which will be be overwritten by
Oh My ZSH to define its own configuration. The following is an excerpt of
that default file, including the interesting parts to be modified:
# If you come from bash you might have to change your $PATH.
# export PATH=$HOME/bin:/usr/local/bin:$PATH

# Path to your oh-my-zsh installation.
export ZSH="/home/user/.oh-my-zsh"

# Set name of the theme to load --- if set to "random", it will
# load a random theme each time oh-my-zsh is loaded, in which case,
# to know which specific one was loaded, run: echo $RANDOM_THEME
# See https://github.com/ohmyzsh/ohmyzsh/wiki/Themes
ZSH_THEME="robbyrussell"
#ZSH_THEME="agnoster"

# Set list of themes to pick from when loading at random
# Setting this variable when ZSH_THEME=random will cause zsh to load
# a theme from this variable instead of looking in $ZSH/themes/
# If set to an empty array, this variable will have no effect.
ZSH_THEME_RANDOM_CANDIDATES=( "robbyrussell" "agnoster" )

...

# Which plugins would you like to load?
# Standard plugins can be found in $ZSH/plugins/
# Custom plugins may be added to $ZSH_CUSTOM/plugins/
# Example format: plugins=(rails git textmate ruby lighthouse)
# Add wisely, as too many plugins slow down shell startup.
plugins=(git z docker)

source $ZSH/oh-my-zsh.sh

...
The ZSH_THEME variable, as it is obvious, allows you to set your favorite
theme by its name. I like the default one robbyrussell.
The plugins section allows you to set your favorite plugins, as for example:
-
git: this plugin shows the active branch within the prompt and it adds a lot of useful aliases to speed up your development workflow. -
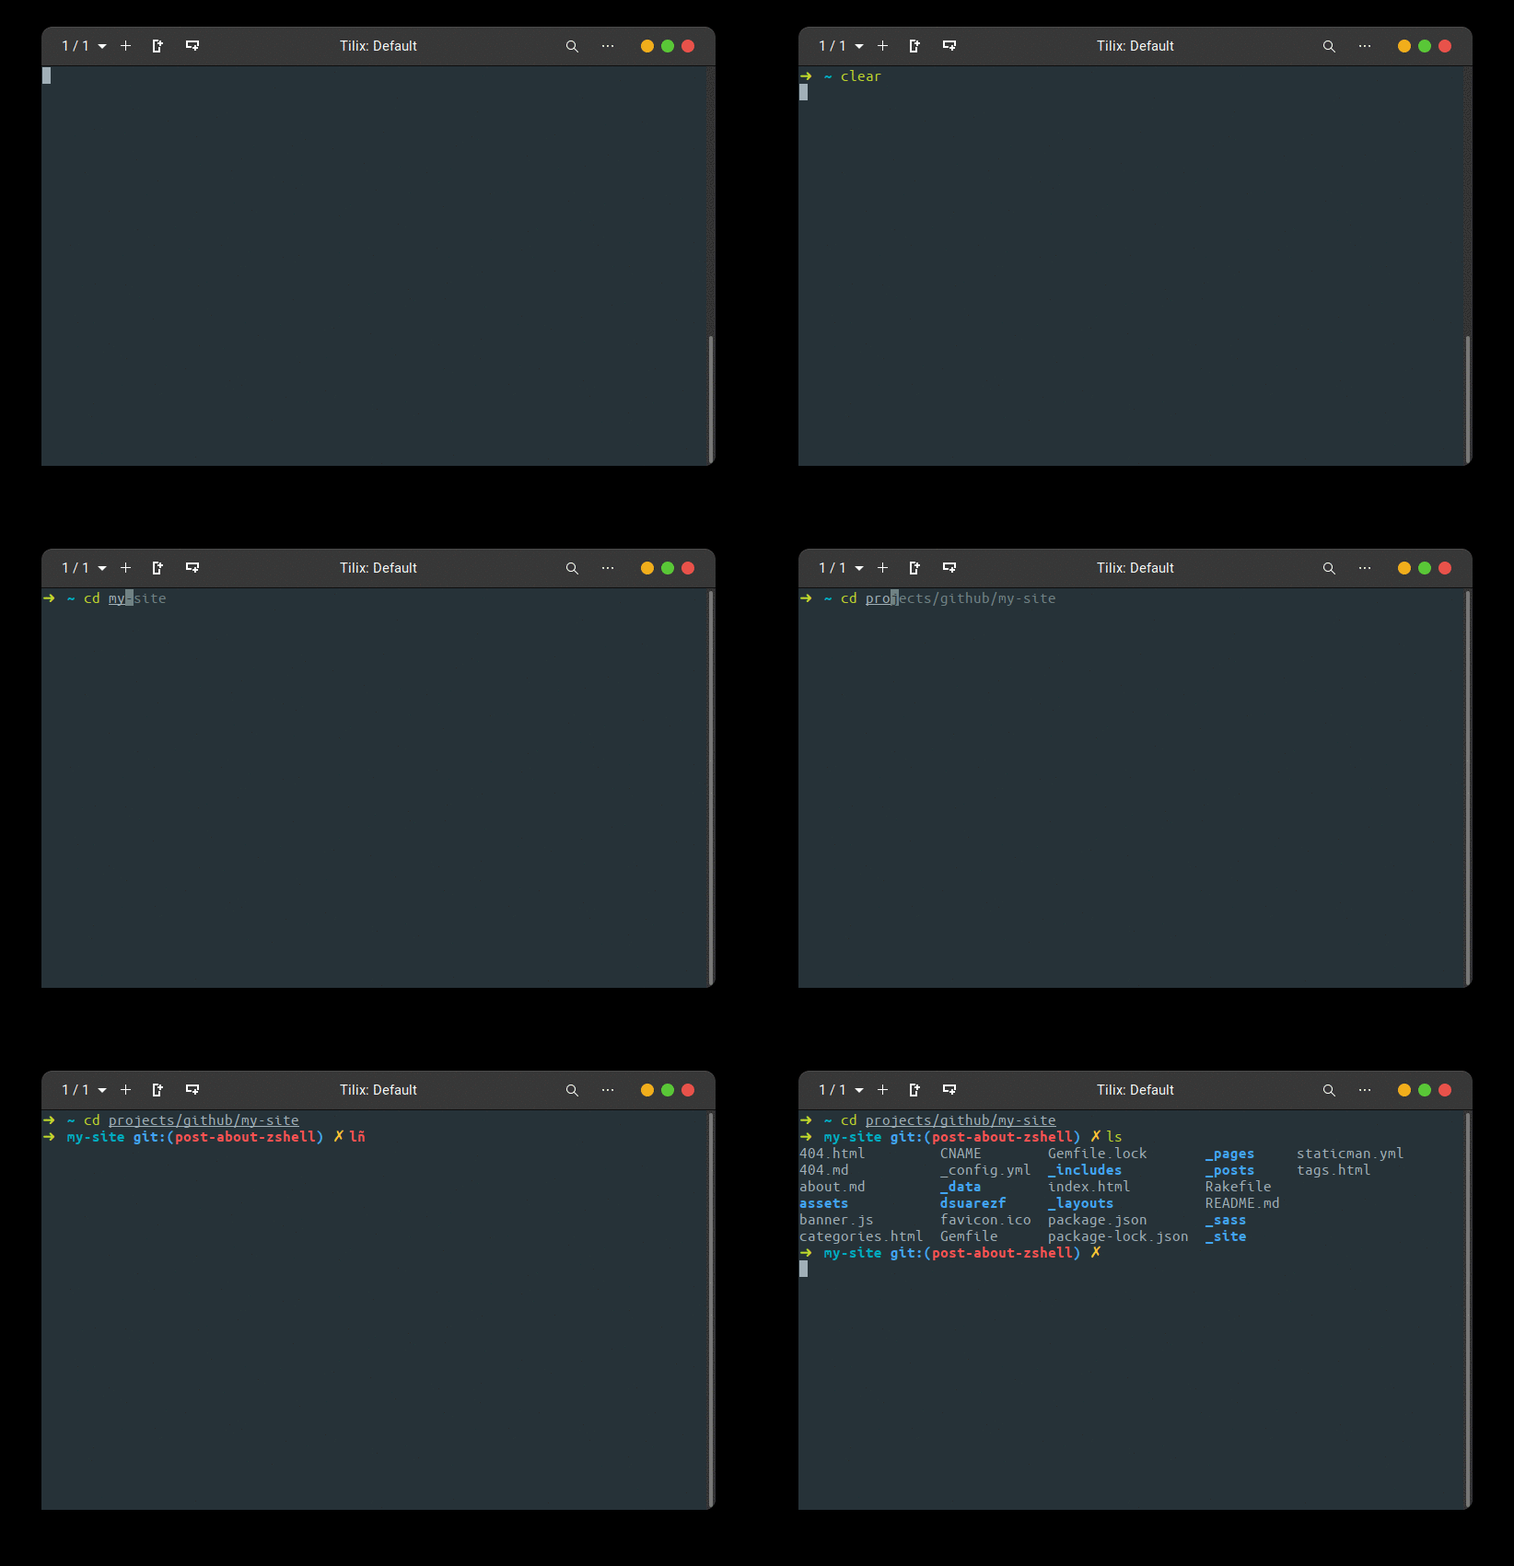
z: this plugin is one of the most useful to save a lot of keystrokes, since it tracks your most visited directories and it suggests them as you start to type. -
docker: this plugin adds autocompletion and aliases to work with Docker.
There are two plugins that I find very useful and that are not included on the Oh My Zsh bundle, they need to be installed independently following the standard procedure based on git clone:
-
zsh-autosuggestions: this plugin suggests commands as you type based on history and completions. -
zsh-syntax-highlighting: this plugin provides syntax highlighting for the shell. It enables highlighting of commands whilst they are typed at the prompt, helping in reviewing commands before running them.
To install the ZSH Autosuggestions plugin execute:
git clone https://github.com/zsh-users/zsh-autosuggestions ~/.zsh/zsh-autosuggestions
To install the ZSH Syntax Highlighting plugin execute:
git clone https://github.com/zsh-users/zsh-syntax-highlighting.git ${ZSH_CUSTOM:-~/.oh-my-zsh/custom}/ plugins/zsh-syntax-highlighting
As a final step you need to add these new plugins to the previous ones by editing
the .zshrc file:
plugins=(git z zsh-autosuggestions zsh-syntax-highlighting docker)
Install only those plugins really needed, since the more plugins you install the slower the terminal is.
Once the .zshrc file is configured properly, I recommend you to port your
specific configuration (variables, paths, scripts, aliases, etc.) from your
previous profile to the end of this file.
This is the final result:


