Enabling the Kubernetes Dashboard
 Kubernetes Dashboard
Although Kubernetes can be fully utilized by just using the Kubernetes API through the kubectl command-line interface, which is in fact the method I recommend to interact with your K8S cluster, there is a Web Interface called Kubernetes Dashboard that can be handy.
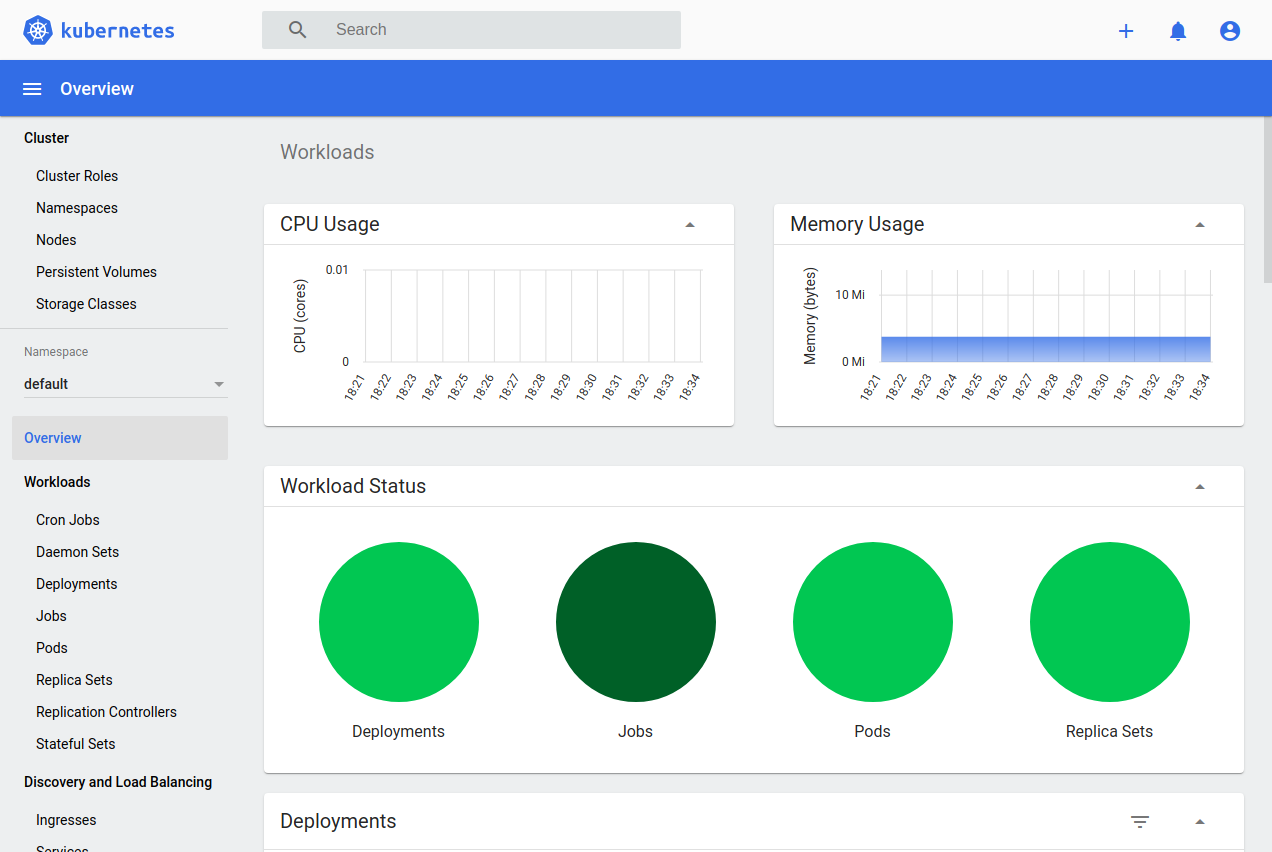
The Kubernetes Dashboard allows to monitor, manage and troubleshoot the applications deployed on the K8S cluster and can be also used to deploy new workloads.
As written on its documentation, the Dashboard UI is not deployed by default on most of K8S distributions, as Minikube, MicroK8s or K3S.
Fortunately, the Dashboard can be deployed as easy as any other deployment by running this command:
kubectl apply -f https://raw.githubusercontent.com/kubernetes/dashboard/v2.2.0/aio/deploy/recommended.yaml
Note that is to deploy the v2.0.0, it can vary upon your K8S version.
MicroK8s brings this shortcut to automate the installation of the Dashboard as an add-on:
microk8s enable dashboard
To test if the Dashboard is installed properly just look for its pods on the kube-system namespace:
> kubectl get pods --namespace kube-system

    NAME                                         READY   STATUS    RESTARTS   AGE
    hostpath-provisioner-5c65fbdb4f-vg7mk        1/1     Running   40         91d
    metrics-server-8bbfb4bdb-2x5b8               1/1     Running   39         91d
    nvidia-device-plugin-daemonset-7wbgl         1/1     Running   40         91d
    calico-kube-controllers-847c8c99d-5kqcv      1/1     Running   38         91d
    coredns-86f78bb79c-grh7r                     1/1     Running   39         91d
    calico-node-78tv9                            1/1     Running   38         91d
    kubernetes-dashboard-7ffd448895-bsl9f        1/1     Running   0          4h41m
    dashboard-metrics-scraper-6c4568dc68-84qrv   1/1     Running   0          4h41m
To access the Dashboard we need to start a proxy between the host and the cluster by running:
> kubectl proxy

Starting to serve on 127.0.0.1:8001
Once the proxy is running we can access the UI on this link:
http://localhost:8001/api/v1/namespaces/kube-system/services/https:kubernetes-dashboard:/proxy/#/login
And we will see this login page:
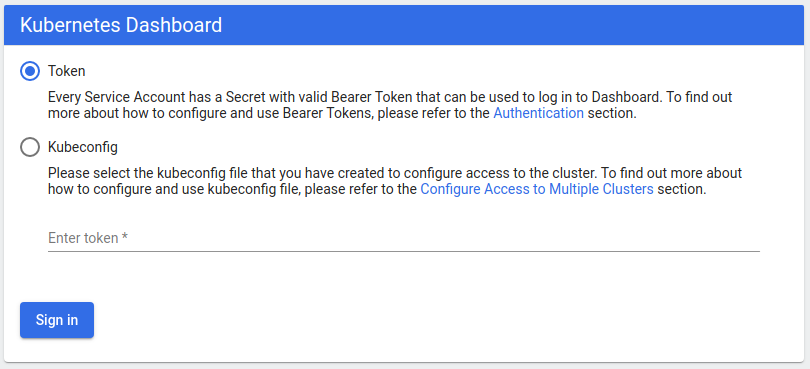 Dashboard login
As we can see, there are two methods to authenticate: token and Kubeconfig.
This token has been generated by MicroK8S during the installation process, to get the token from the cluster, just execute:
token=$(microk8s kubectl -n kube-system get secret | grep default-token | cut -d " " -f1)
microk8s kubectl -n kube-system describe secret $token
You can just copy and paste the token on the field.
If you do not want to paste the token you can use the .kube/config file to
access.
Once you login you get the Dashboard.